
Claude Code Setup Guide (Mac)
Want to get started with Claude Code? Not sure where to start? This guide is for you.


Claude Code is like having an incredibly capable assistant in your computer.
Ask it to help you triage your email. Have it prep you for your meetings. Have it parse through a large set of files (datarooms, contracts, resumes, credit card statements). Have it create marketing materials, customer proposals, and slide presentations. Have it update info in your CRM or pull the latest AR aging from your ERP.
Claude “Code” sounds like it’s only for writing software. It isn’t. It’s for doing anything on a computer. And you just talk to it in English.
So how do you get started?
This is the trickiest part. But it’s very doable, and we’ll walk you through every step.
We’ve written about this in the past, but we’ve realized the instructions are a bit scattered. So the goal of this post is to have everything in one place.
You don’t need to do all of this in one sitting. Just do Part 1 (install) and you’ll be able to start playing with Claude.
When you have time, we still recommend taking a look at our earlier posts for deeper context on Claude: Claude Code for Business Users, Create Your Personal Agent, and Let Claude Keep Track of Everything.
This guide is for Mac users. If you’re on Windows, please read our companion post for Windows users.
Part 1: Installation
Sign up for a paid Claude account if you don’t already have one.
Note: Do this before installing Claude - the flow is buggy if you try to sign up in the middle of authenticating.
Individuals: you can start with the Pro tier. You’ll likely want to upgrade to Max later.
At work: if you are using Claude at work, your company likely already has a Teams or Enterprise license for you.
Privacy: If you’re on an individual account (Pro or Max), go to Settings > Privacy > “Help improve Claude” and turn that off. Privacy is managed centrally by IT for Teams and Enterprise accounts.

Settings > Privacy > toggle off Help improve Claude
Open Terminal
Search for it by pressing Command + Space, type “Terminal”, and hit Enter. Or go to Finder > Applications > Utilities > Terminal
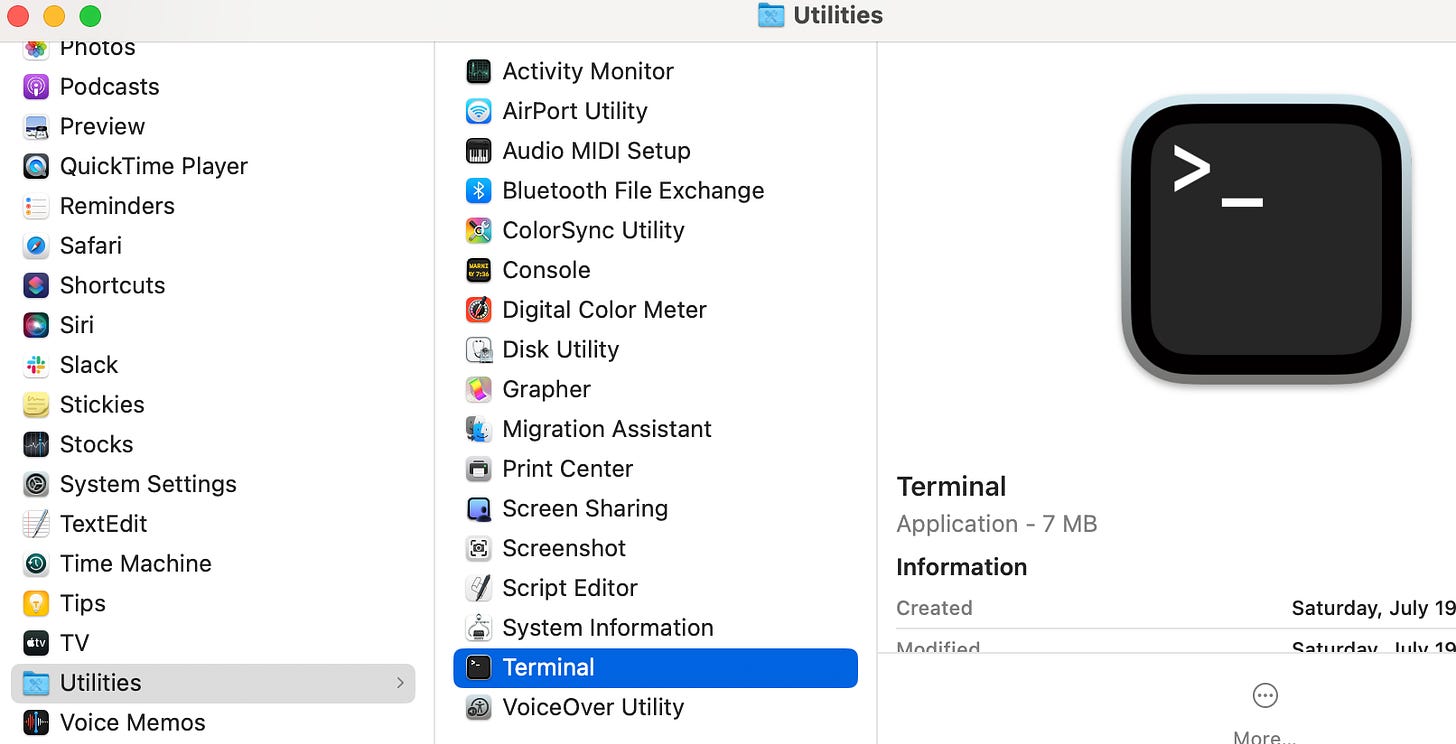
Finder > Applications > Utilities > Terminal 
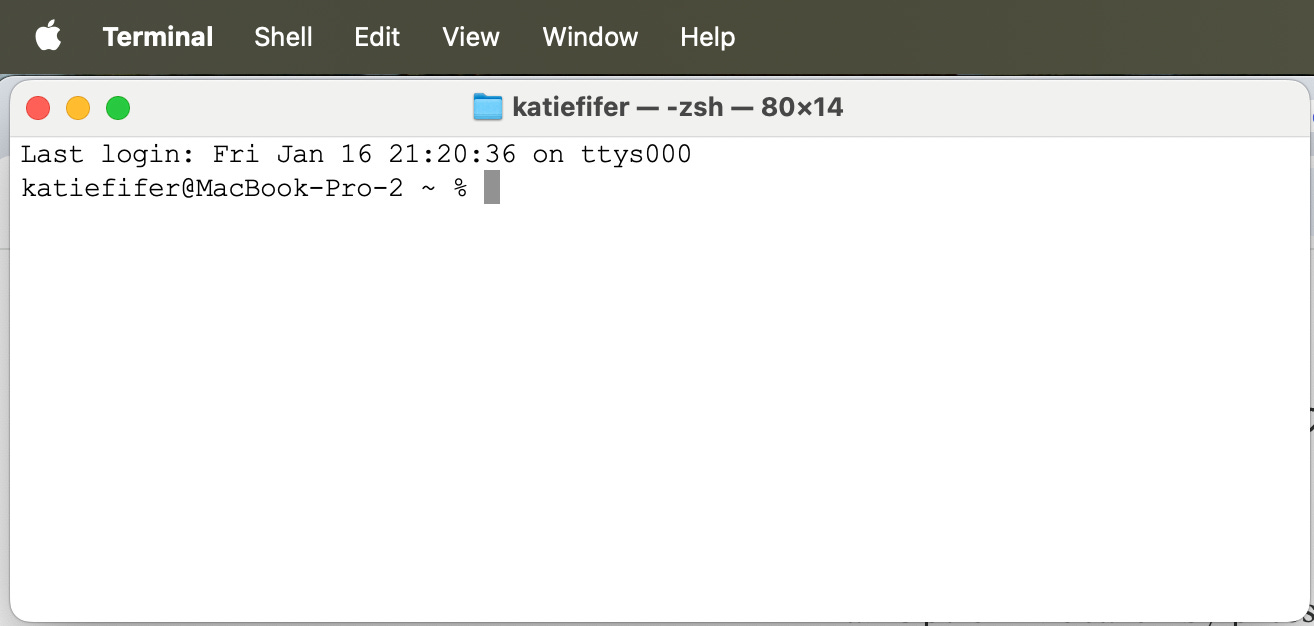
The Terminal just looks like a window where you can type things. Once we get Claude running, you’ll just talk to Claude in English Install Claude Code
Copy and paste this text into your Terminal, then press Enter (return):
curl -fsSL https://claude.ai/install.sh | bashWait for it to finish. You should see “Installation complete!”

Paste the code starting with “curl” above into the terminal and hit Enter Make sure your Terminal can find Claude from anywhere
Copy and paste this line of text into the Terminal, then press Enter. This instructs your computer on where to find Claude.


echo 'export PATH="$HOME/.local/bin:$PATH"' >> ~/.zshrc && source ~/.zshrcClose the Terminal
Create a folder
We’ll want a folder where we can work with Claude. Open Finder and create a new folder. Ideally name it something other than “Claude” to minimize confusion.
You’ve now installed Claude Code and are ready to start working with Claude. In the next step, we’ll show you where to work with it and how to confirm it is working.
Part 2: Where You’ll Work With Claude
Where should you work with Claude Code? We recommend VSCode. The Desktop app is also an option if you strongly prefer a point-and-click interface, but it’s buggier. We’ll walk you through VSCode first.
VSCode
Download VSCode: https://code.visualstudio.com/
Install it by double-clicking what you downloaded (should say something like VSCode-darwin-universal.dmg and be in your Downloads folder). Drag the Visual Studio Code icon into the Applications folder to install.
Open VSCode from your Applications folder (double-click the icon). We also recommend pinning it to your dock at the bottom of your screen (Right click (or Ctrl+click) the icon > Options > Keep in Dock).
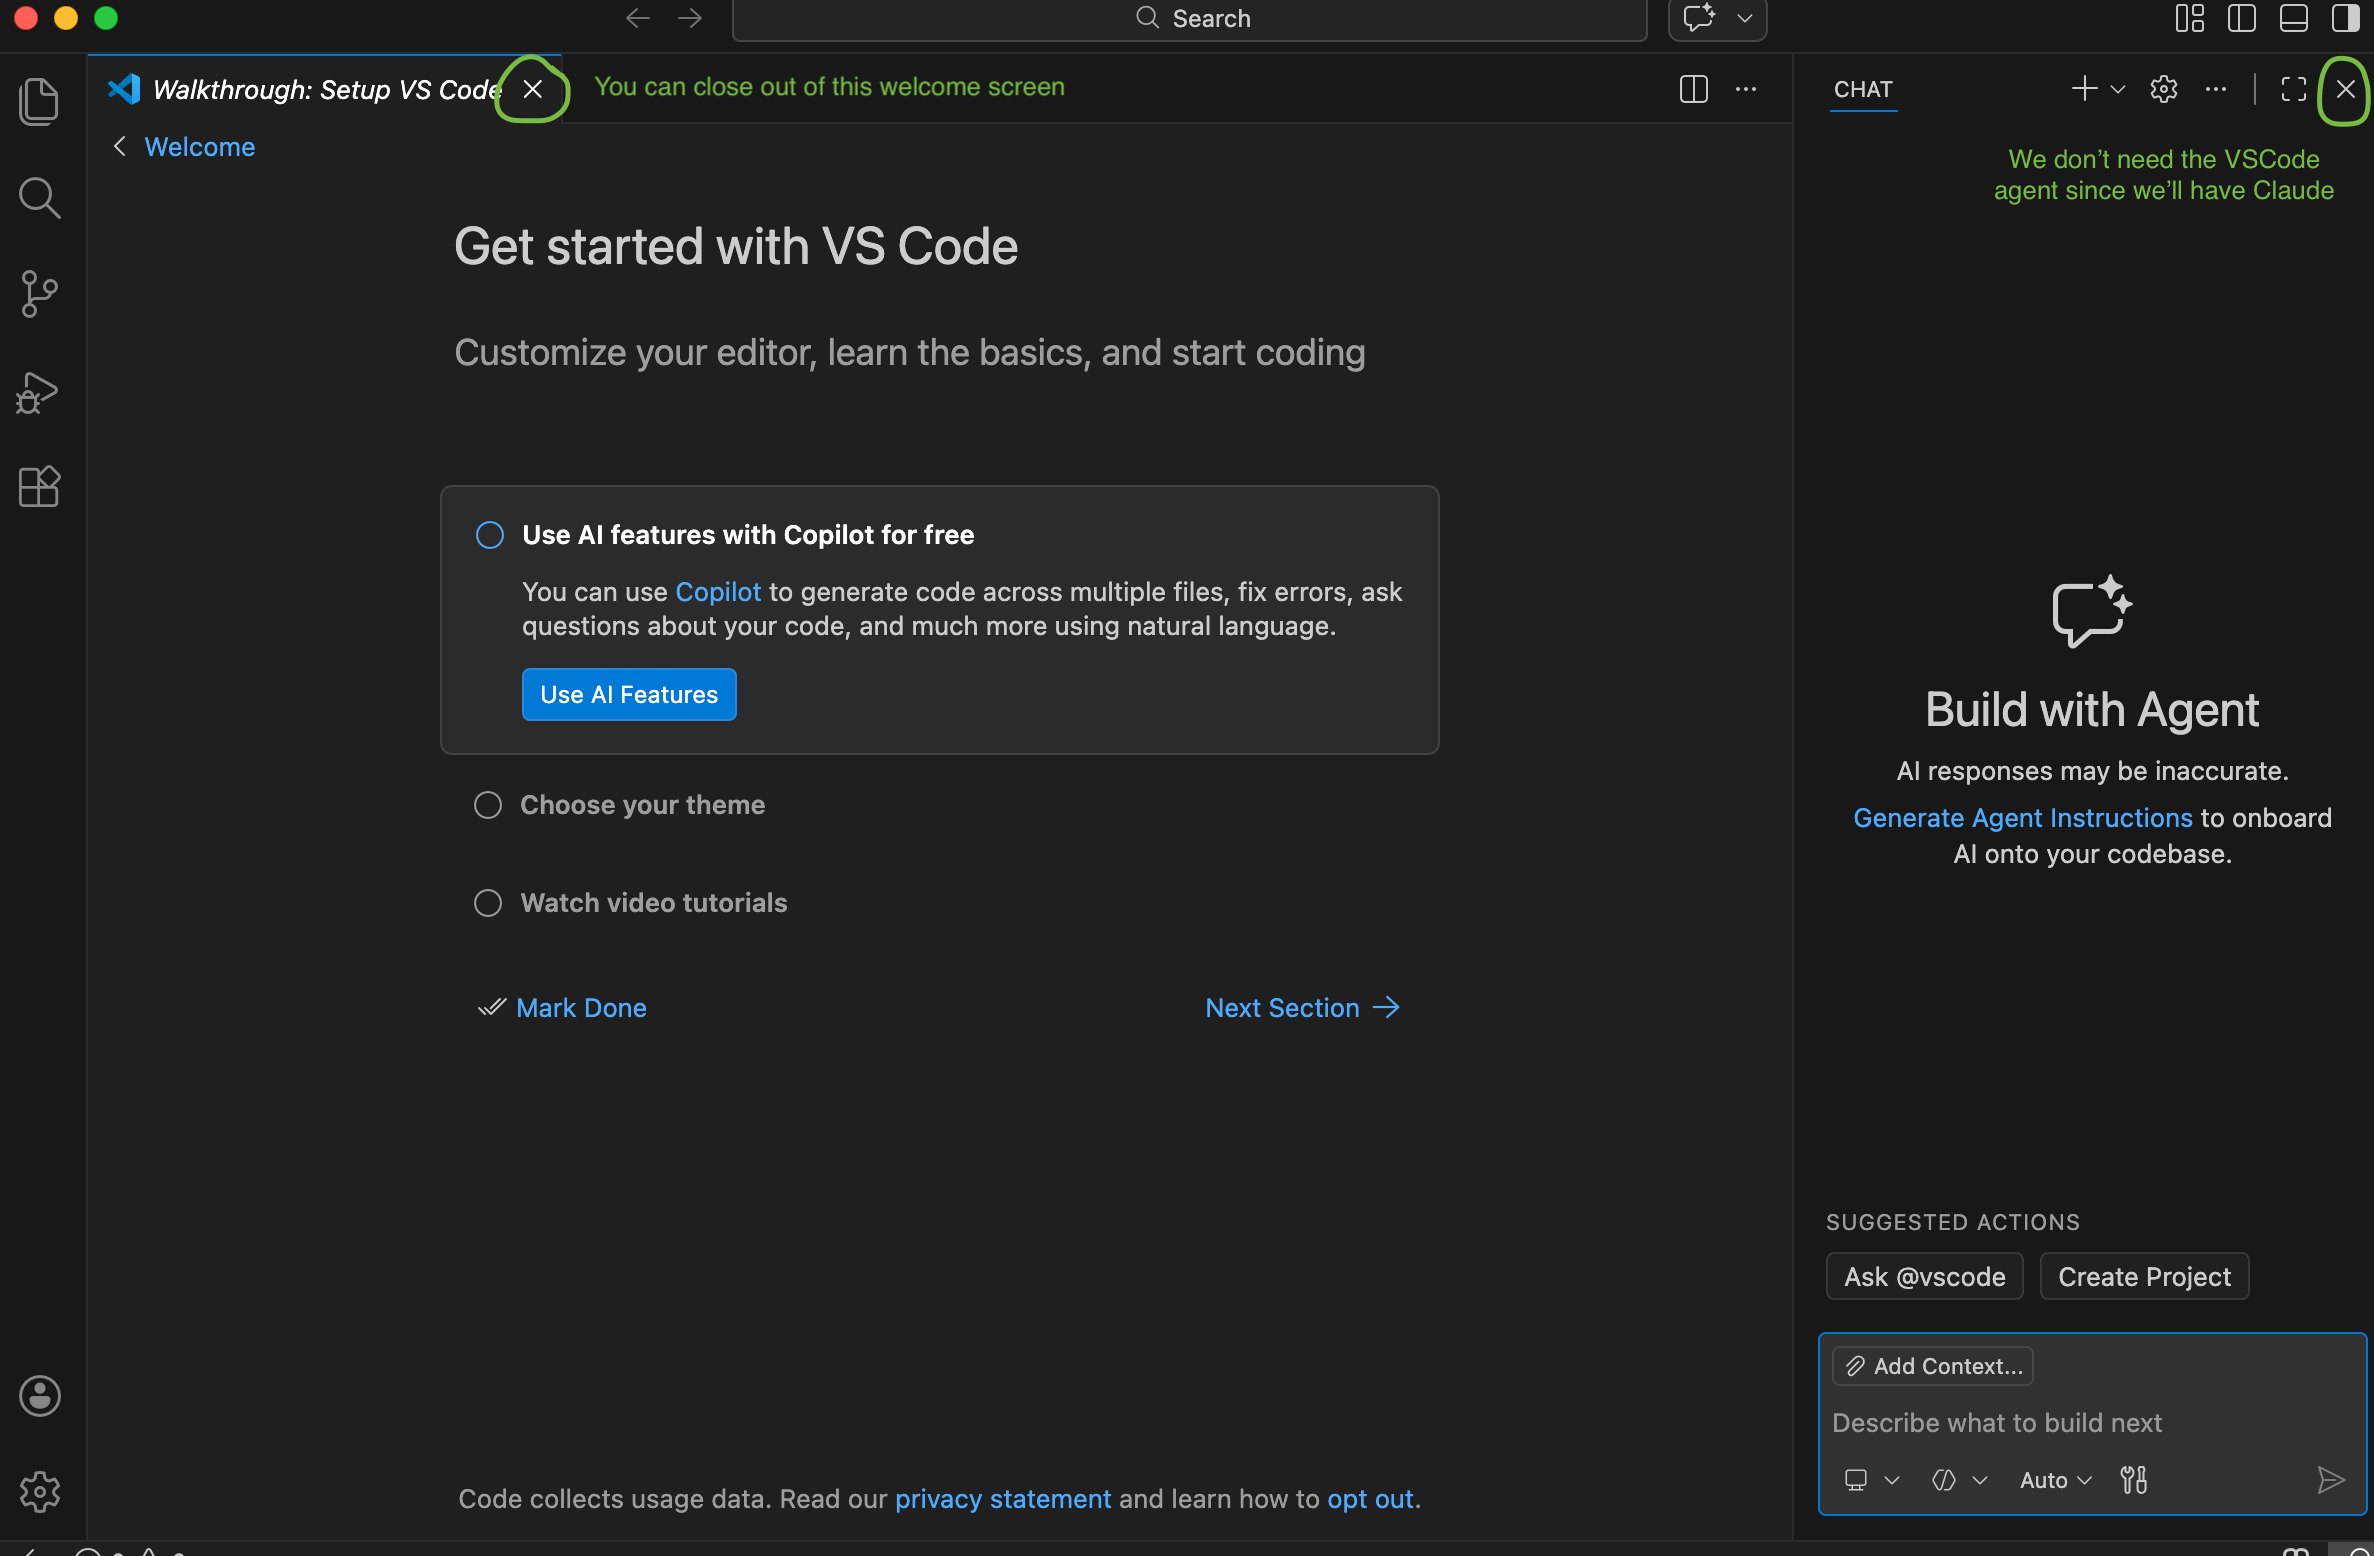
When you open VSCode it will likely show you some things you don’t need. Specifically:
A welcome screen. Click the “x” next to “Welcome” to make this go away.
A VSCode agent on the righthand side. We don’t need this since we’ll have Claude. Click the “x” in the agent section on the right.
You can click “x” towards the top left to close the Welcome screen and “x” at the top right to close the VSCode agent.
In VSCode, click File > Open Folder > select the folder where you want to work with Claude. [This is the folder you created in Part 1, step 7]
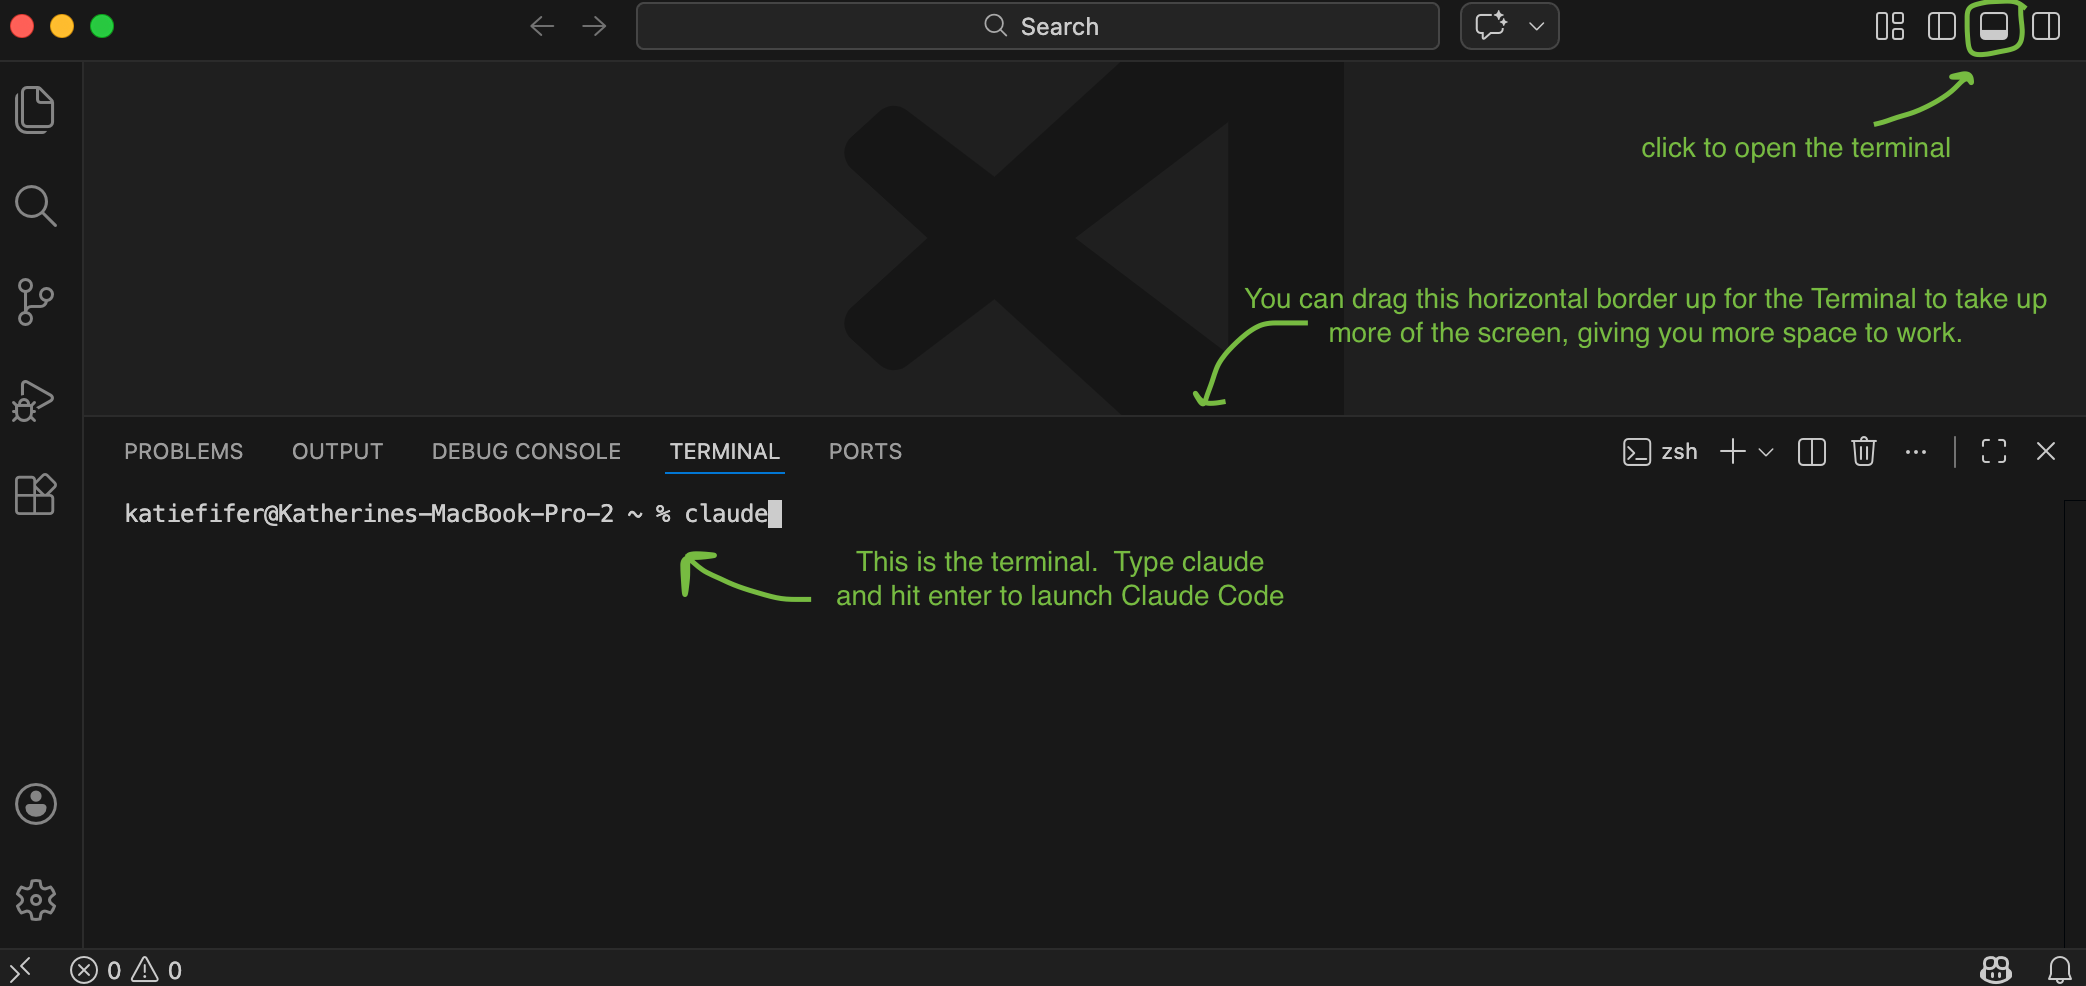
Open the Terminal in VSCode
Click the toggle icon in the upper right (looks like square with the bottom half shaded in). The Terminal will automatically open in the folder you selected. You can drag the horizontal bar above where it says “Terminal” up to have it take up more of the screen.
Type
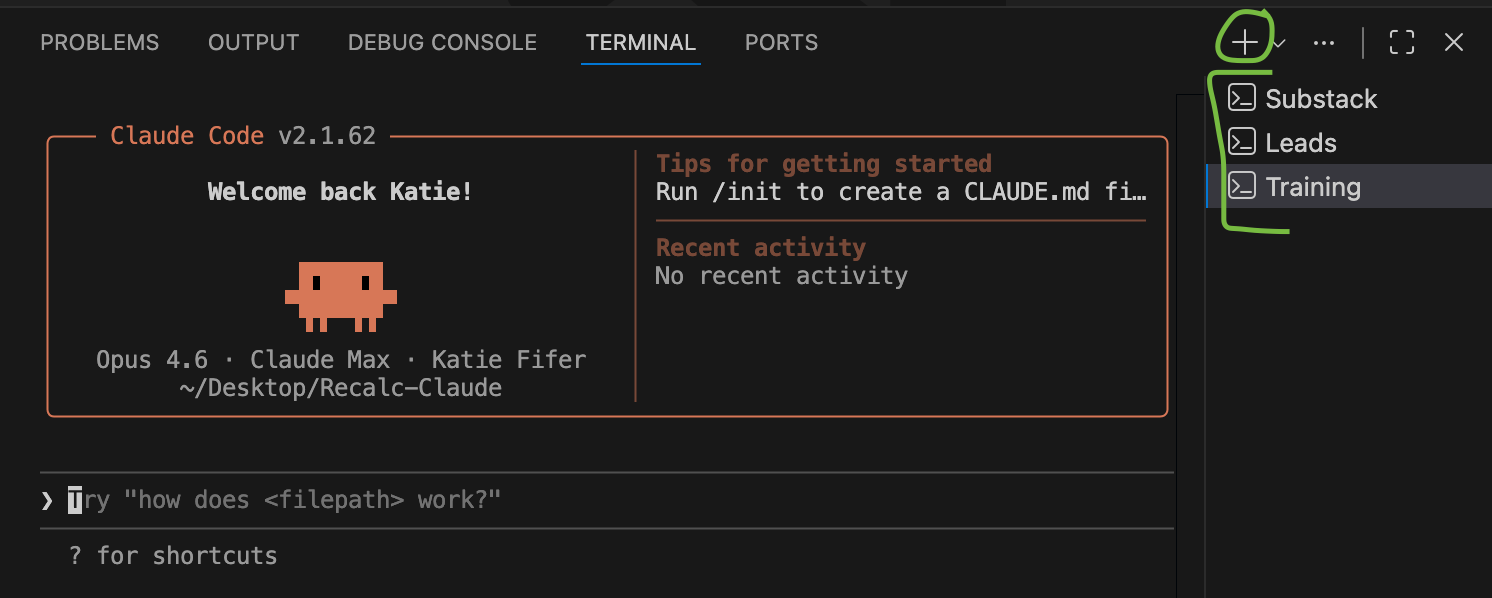
claudefollowed by Enter to launch Claude Code.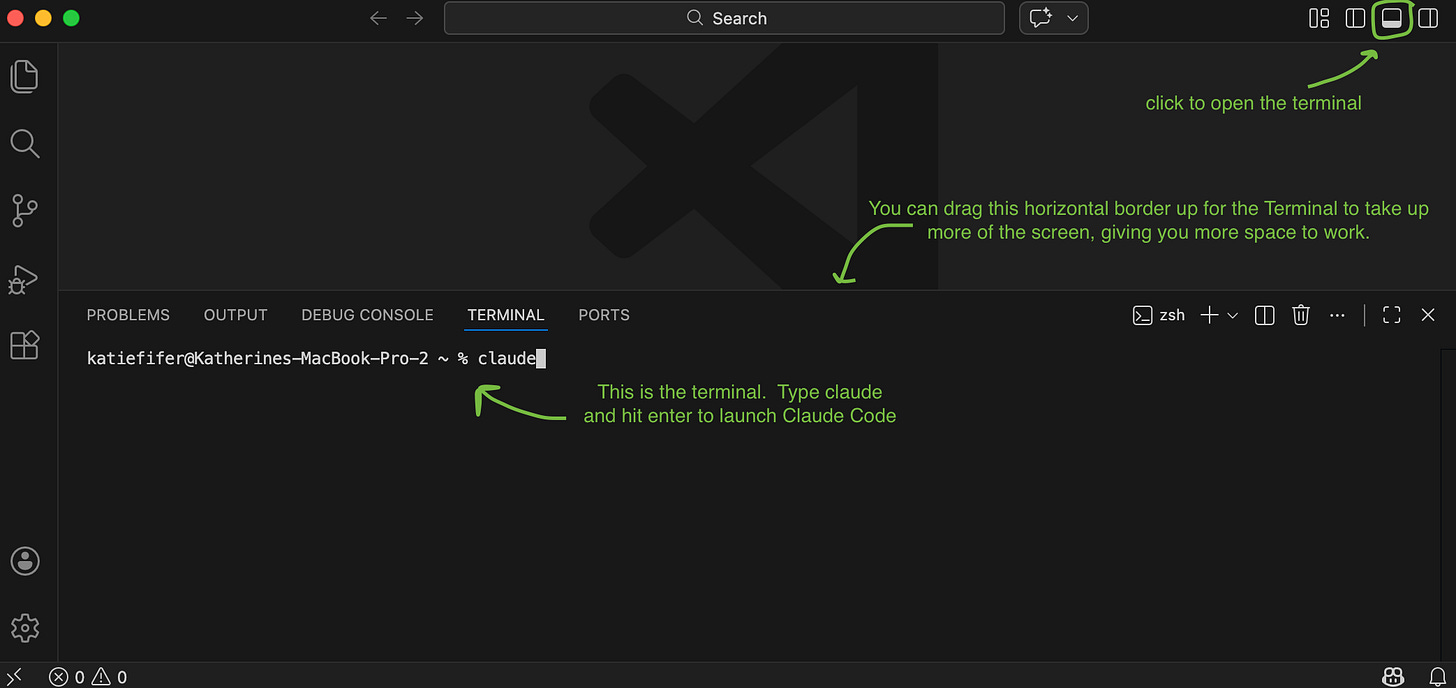
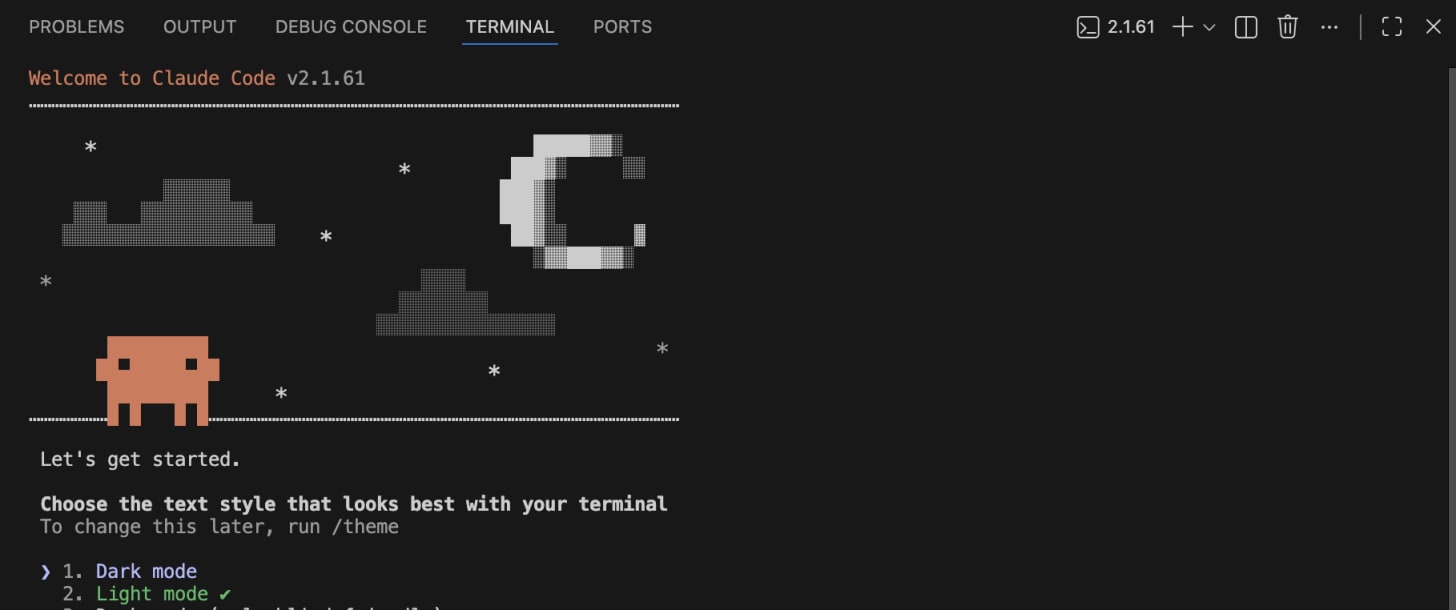
This should launch Claude (you’ll see the orange Claude animation like the one below).
Type claudefollowed by Enter to launch Claude CodeTroubleshooting: if you typed
claudefollowed by Enter and it did not launch Claude, something went wrong in your installation. You should do the following:Screenshot the error message that you see.
Give the screenshot and also a link to this post to regular AI chat (either claude.ai or ChatGPT). Ask it to help you troubleshoot. Iterate by pasting screenshots back-and-forth until you get it working.
Now that you have Claude running, navigate through the rest of their onboarding flow.
Choose dark mode or light mode, hit Enter.
Select login method of “1. Claude account with subscription”. That will open your browser and you can log in. Once you log in, go back to VSCode.
Press Enter through the rest of the onboarding steps.
It will ask if you want to use “high effort” or “medium effort”. We’d recommend you use “high effort”. It will use your monthly allowance more quickly, but it produces better results. In the future, you can type
/usageto check usage limits.

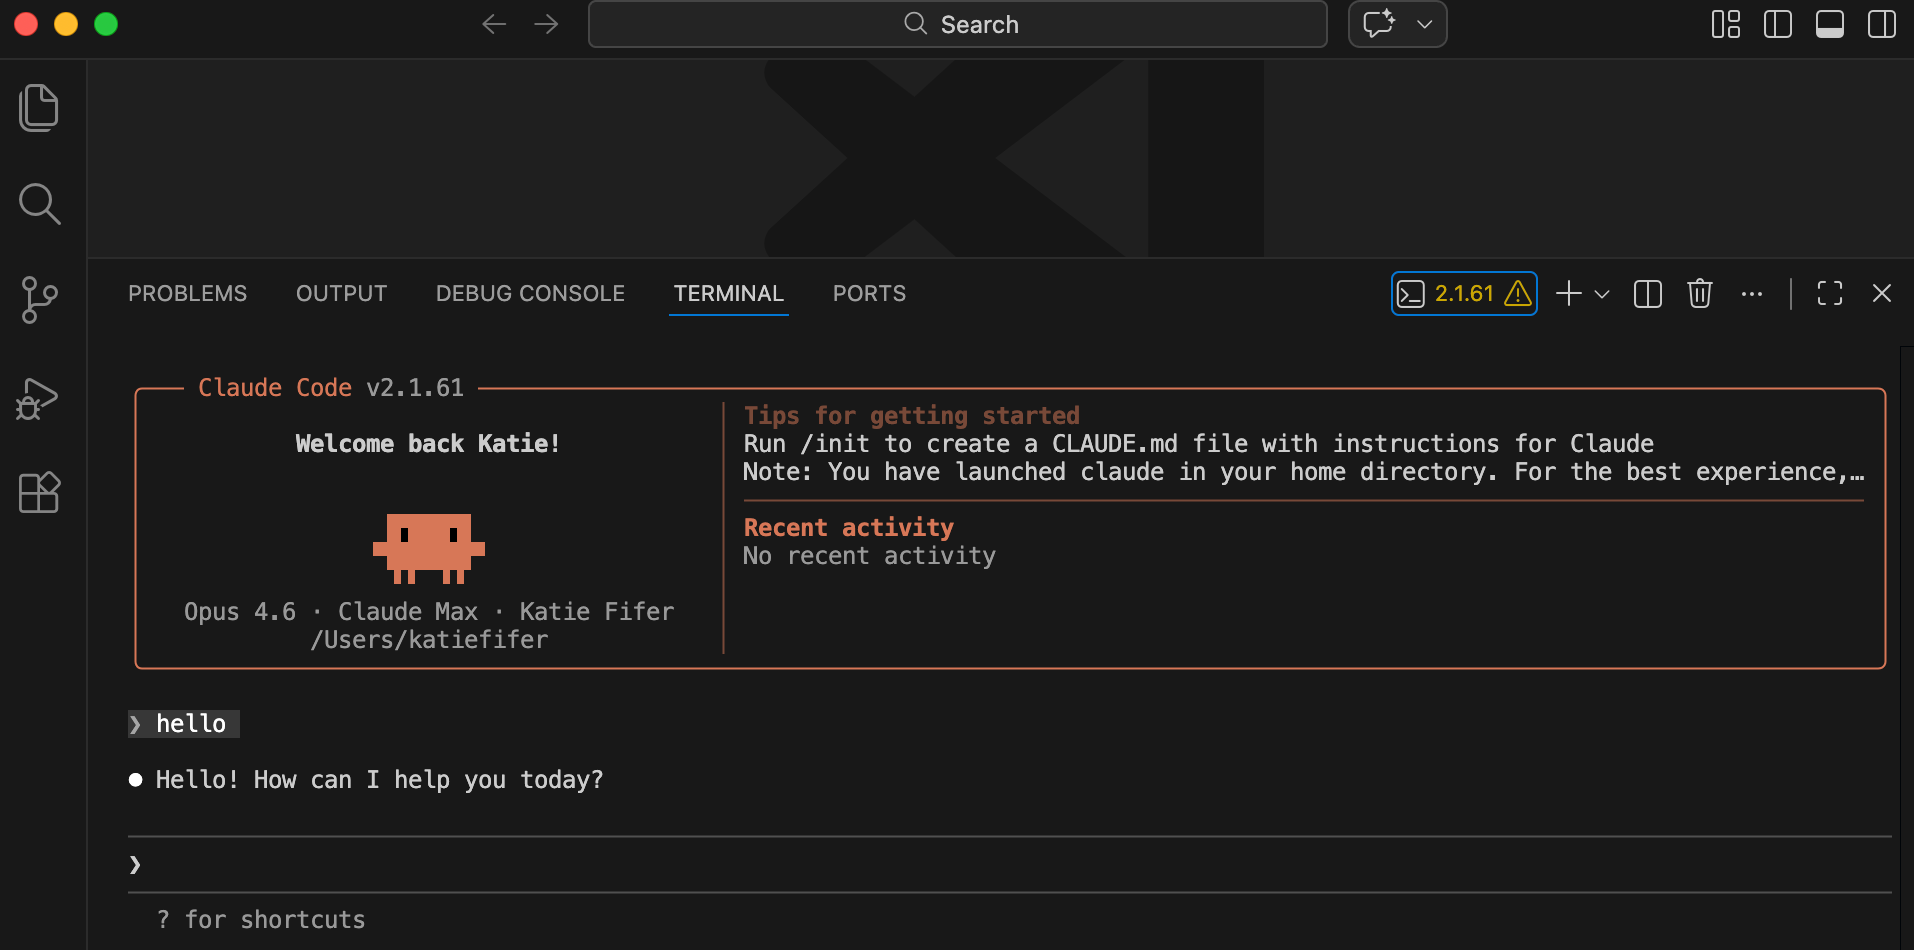
Claude should be waiting for your input. Type “hello” followed by Enter. It should say hi back! And from here on, you’re just typing in English.
VSCode Workflow Tips
Working in the terminal in VSCode is unfamiliar at first. These tips will help:
Screenshots
To take a screenshot: Cmd + Shift + 4
You can drag the screenshot into the terminal. Open Finder > find the Screenshot (in Recents or Desktop). Drag and drop the picture into Claude in the terminal.
Files
In VSCode, you should be able to see your files on the left when you click the paper-shaped icon or hit Cmd + Shift + E. Note your folder is likely empty, so you’ll just see your folder name at the top for now.
You can drag and drop files from Finder into Claude or tell it the pathname of files on your computer (Option + Cmd + C copies the path which you can paste into Claude). In Finder, you can also put files into the folder Claude is working in and then tell Claude they are there.
Run multiple Claudes for different workstreams. Once you get comfortable in Claude Code, you may want to run multiple different conversations in parallel (for efficiency with Claude and to manage the context window).
You can hit the “+” symbol to open more terminals. You can then type
claudefollowed by Enter to launch Claude in each one. To navigate between them, hit Cmd + Shift + [ or ]. You can also Ctrl+click the terminals to name them.
claude in each one. Claude Desktop App
Download the Claude Desktop app: https://claude.com/download. Note: even if you will primarily work with Claude in VSCode, it’s worth downloading the Desktop (for Connector configuration).
To use Claude Code in the Desktop app, click the “Code” tab in the top middle. Then click “Select folder” and choose the folder where you want to work with Claude. From there, just type to Claude in English

Claude Code in Desktop

If you get comfortable with VSCode, we generally recommend that over using the Desktop app. The Desktop app is still buggier and is also a bit of a memory hog. However, if you much prefer to use the graphical interface, it’s a good option for that.
Part 3: Set up your initial filesystem with Claude
One of the most powerful things you can do with Claude is have it keep notes on everything. In regular AI chat, when you close a conversation, that context is gone. With Claude Code, that completely changes. Have it write notes (local plaintext markdown files) and it will be able to reference those in any future conversations. Each subsequent piece of work you do with Claude is then much better as a result.
Read our post Let Claude Keep Track of Everything for more context on this idea.
Starting Your Filesystem
Prompt Claude (adjust for your work):
“I’d like you to take notes on the things I work on. This will include clients, projects, administrative work, etc. Please start a filesystem for keeping these notes. First, ask me any questions that would be helpful in structuring this.”
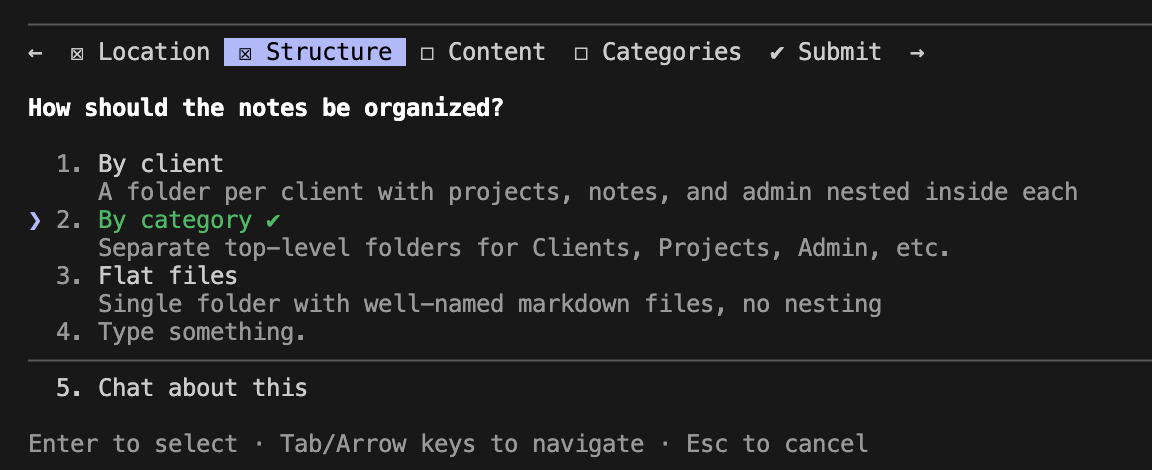
Claude will ask you some clarifying questions. It may do this in a freeform fashion or give you multiple choice questions to navigate with your keyboard. If multiple choice:
Navigate with your arrow keys, use “Enter” to select choices, and Tab or left/right arrow to navigate to the next/previous question.
If you pick the “Type something”, make sure you both select it with “Enter” and also type whatever you want to tell Claude.

Claude may ask you multiple choice questions. Use your arrow keys (up/down for the selections, right/left or Tab for questions) and Enter to select/deselect
Claude will create some folders and simple text files (ending in .md - these are called “markdown” files, but they’re just plain text). Don’t worry too much about the structure since Claude can easily reorganize everything later.
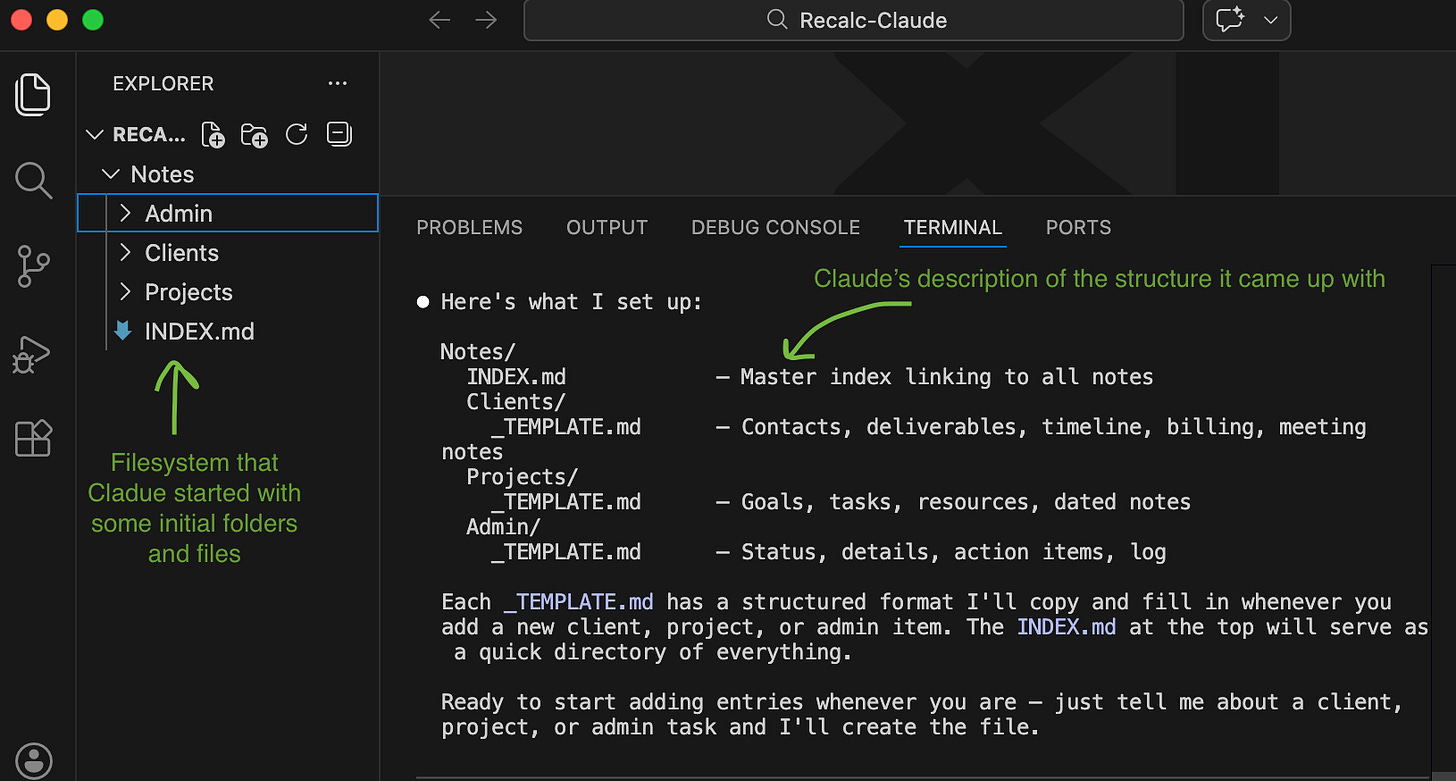
Claude set up Admin, Clients, and Projects folders inside of a Notes folder here. Ask Claude to create your first note. Think of a client, project, or deal conversation you had today. Type some freeform thoughts into Claude. For example:

Here are notes on my call with Jane at Westbridge. They want to do Claude AI training for the full team. Discussed a session on the Claude ecosystem, two sessions on Claude Code, and one on Cowork. Want to include use cases throughout and practice exercises for the team. She’s talking to their COO, we should get a proposal over and check back in on Friday.
We haven’t covered connectors yet, but once you have Claude connected to email, you could then ask Claude to add to the notes with any additional context it finds from your emails with that client. All of this sets you up well to then have Claude help you draft the proposal (or do whatever the next steps might be).
Keep It Going
The key is building the Claude note-taking habit. If you’re on a call, type your notes into Claude. Any time Claude helps you with something, end with: “update your notes with what we just did.” Over time, your notes become a rich, living record of your work. Fewer things slip through the cracks because Claude is tracking them. And Claude can do much better work with you because it has the context.
Use Obsidian To View Markdown Files
Obsidian is a free tool that runs locally on your machine and makes it easier to read markdown files - it renders them with better formatting. You can also edit the files yourself in Obsidian.
You can download Obsidian here: https://obsidian.md/ Double-click the downloaded file to install it. Drag the Obsidian icon into Applications to install.
Open Obsidian from your Applications folder. Pin it to the dock (Right click (or ctrl + click) > Options > Keep in Dock)
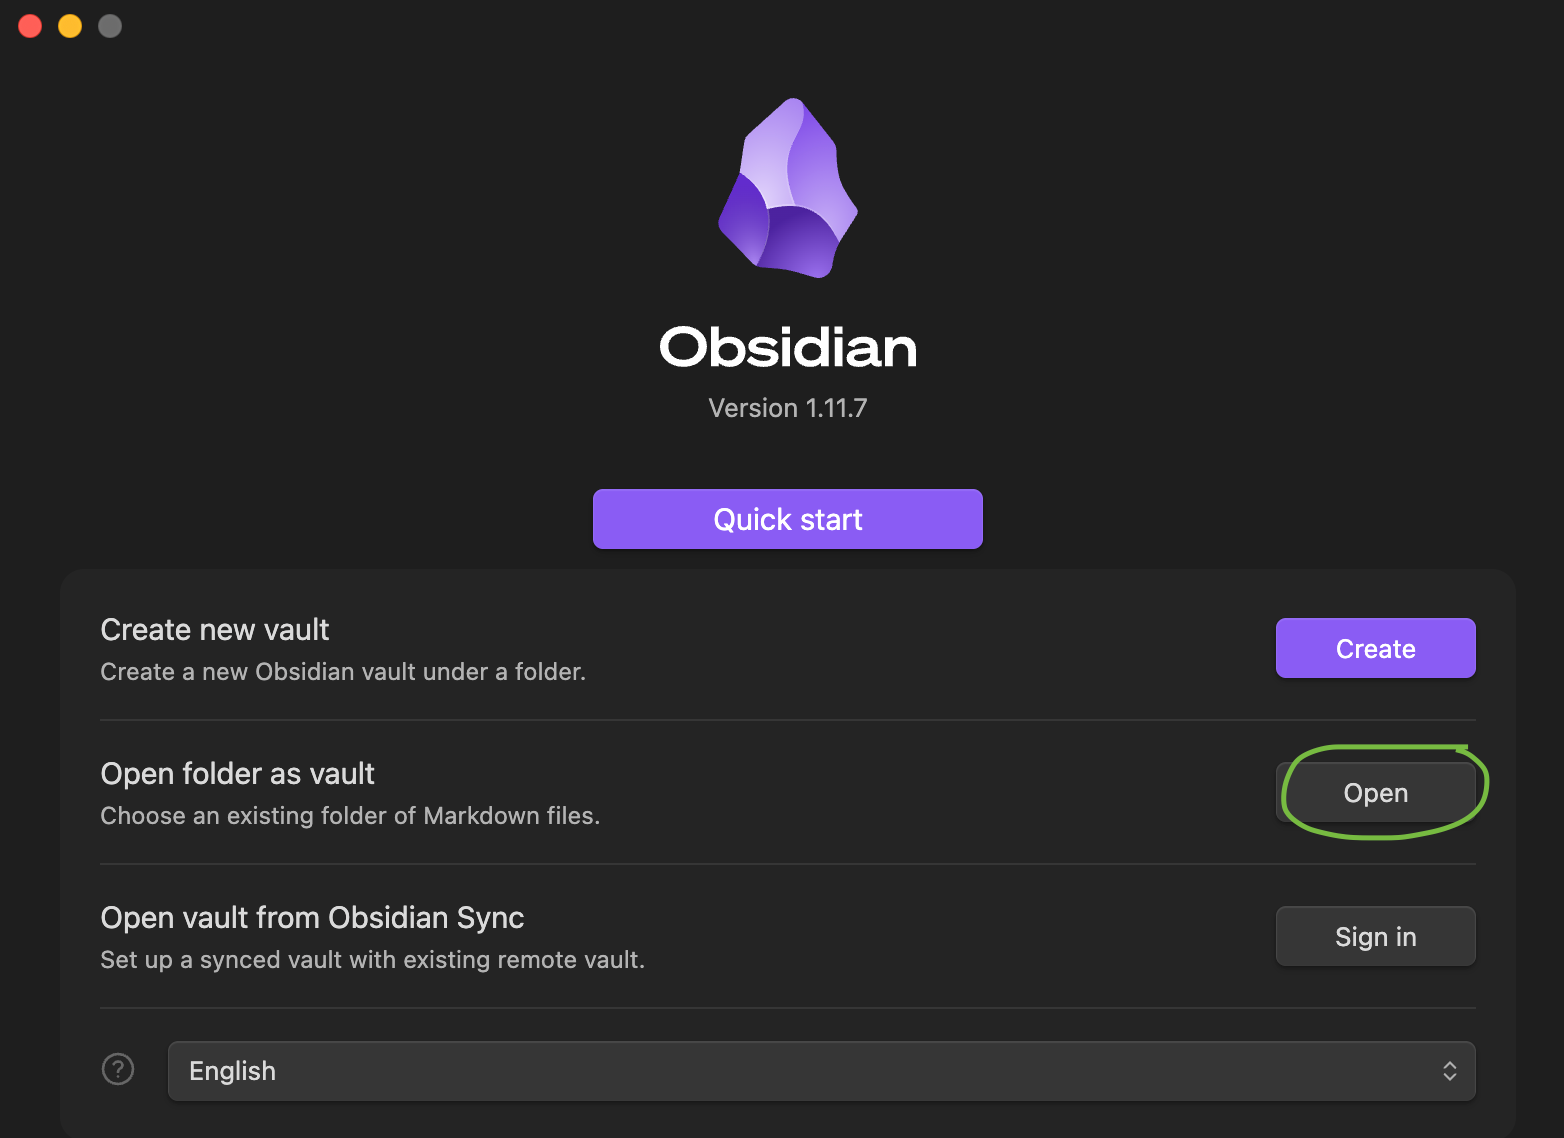
Click “Open” in Open folder as vault. Navigate to the folder where you’re working with Claude and click “Select folder”.
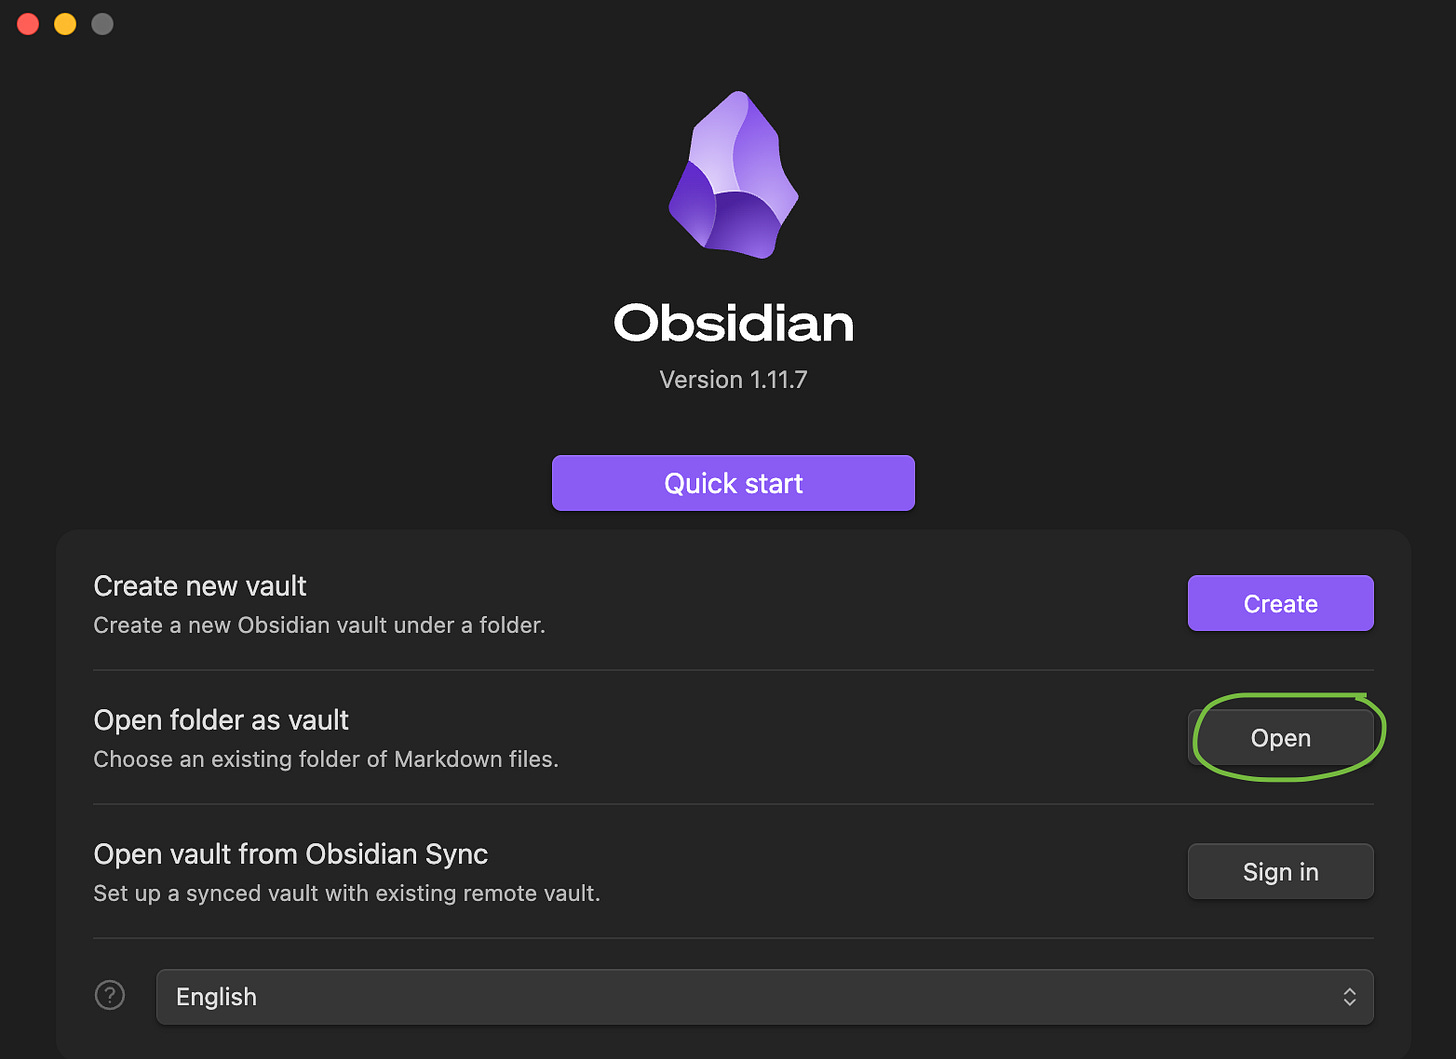
Open folder as vault > select the folder where you’re working with Claude 
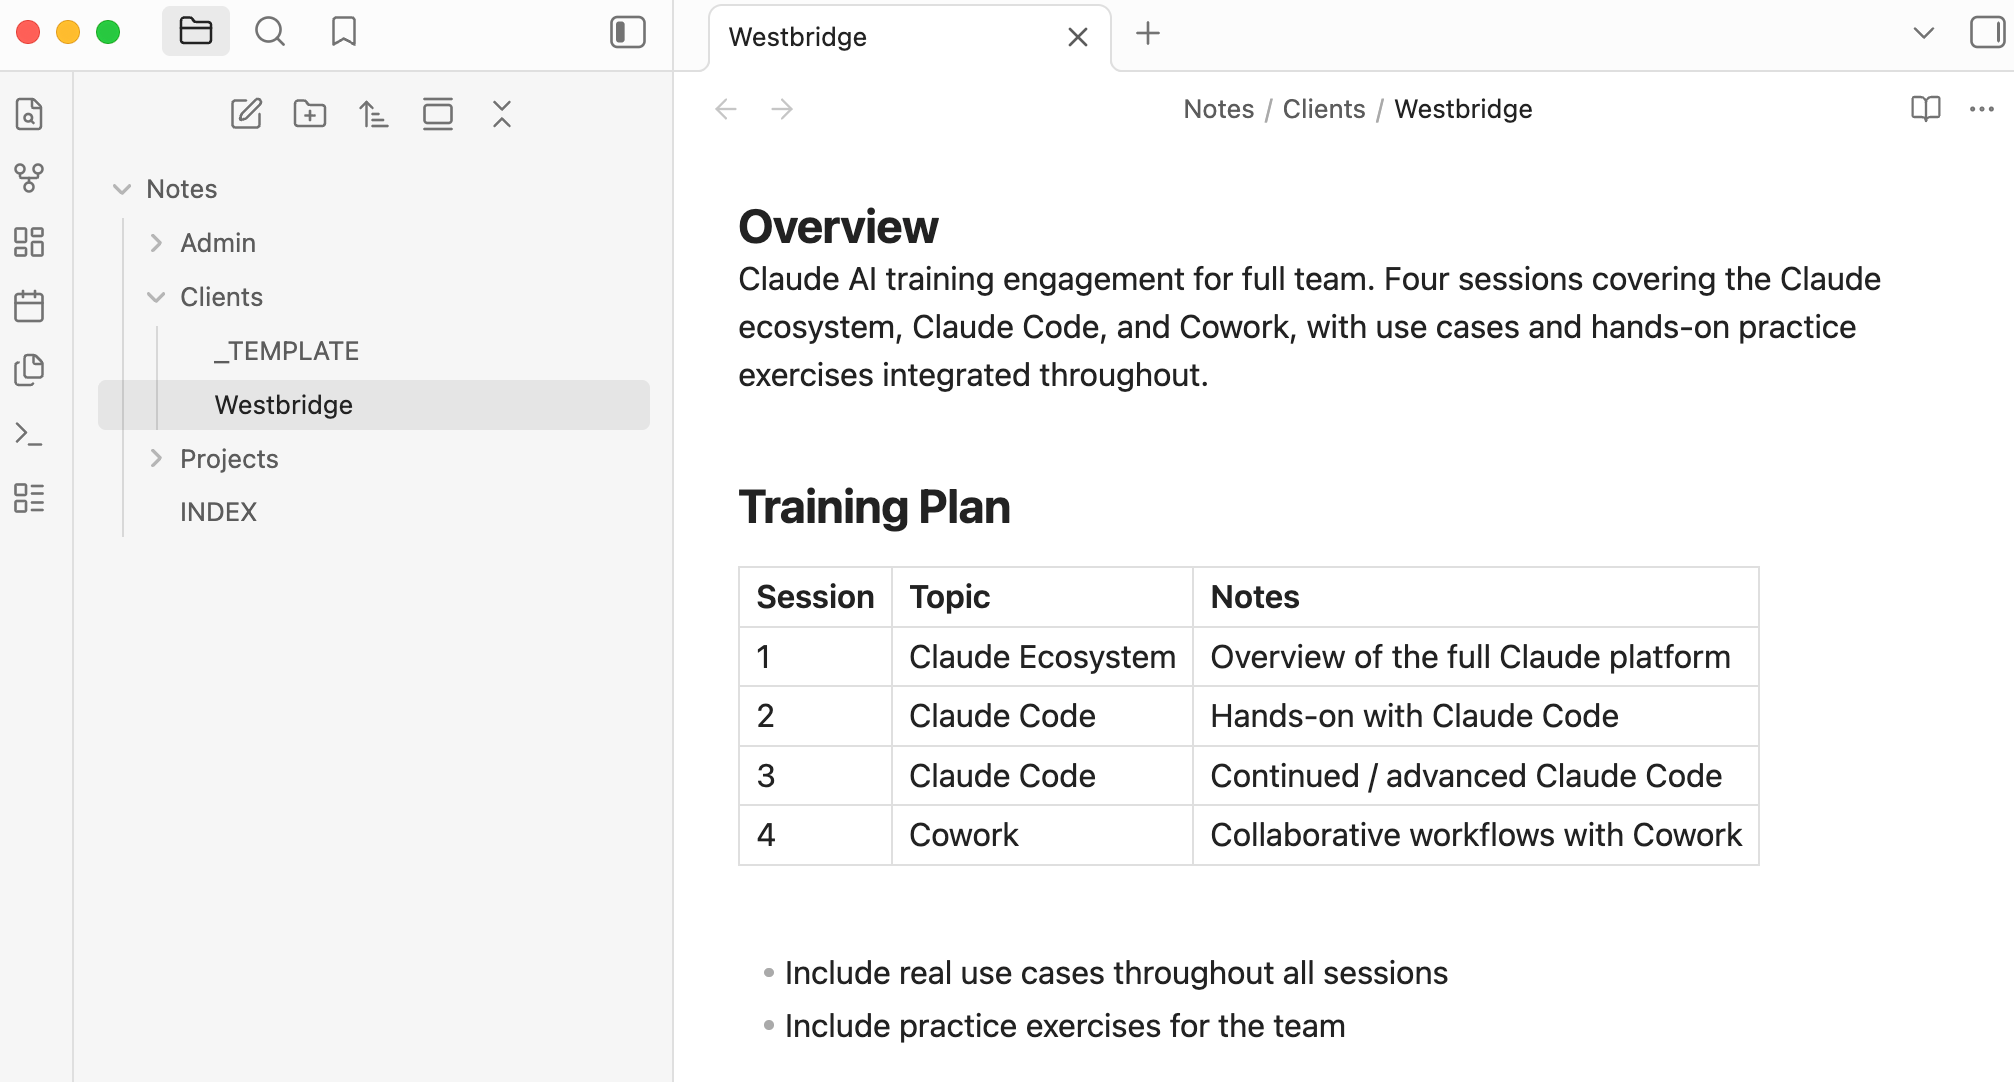
Viewing notes Claude wrote in Obsidian. You can navigate the folders and files on the left and read/edit on the right. You can click the “+” at the top to open more notes in parallel. Navigate between them with Cmd + Shift + [ or ] Tips:
Tell Claude to use wiki links to link between any files that reference one another. Then if, for example, a client note references a separate project note, it will be a clickable link in Obsidian to jump to that related file.
When you’re collaborating with Claude on writing, it’s sometimes helpful to give it inline comments in the document. You can do that by leaving notes in the markdown file you’re writing with Claude (@claude) - then ask Claude to read and incorporate those comments.
Part 4: Connectors
Claude Code becomes much more capable when you connect it to your other systems. And once you interact with those systems through Claude, you might not even want to go use those systems yourself anymore - just let Claude do it.
Connections are feasible through something called “MCP - model context protocol” - Claude can connect and use APIs to figure out how to pull or push data to those systems. This can include your email, calendar, CRM, ERP, and more.
Read our post: Create Your Personal Agent for more on this idea.
There are a few ways to turn on specific connectors:
Native connectors - can be turned on in claude.ai and they will also show up in Claude Code.
Use Rube.app (from Composio) as a middleware “bucket of connectors” through which you can connect to 500+ different apps
Install individual MCP servers (a bit more technical)
Native connectors
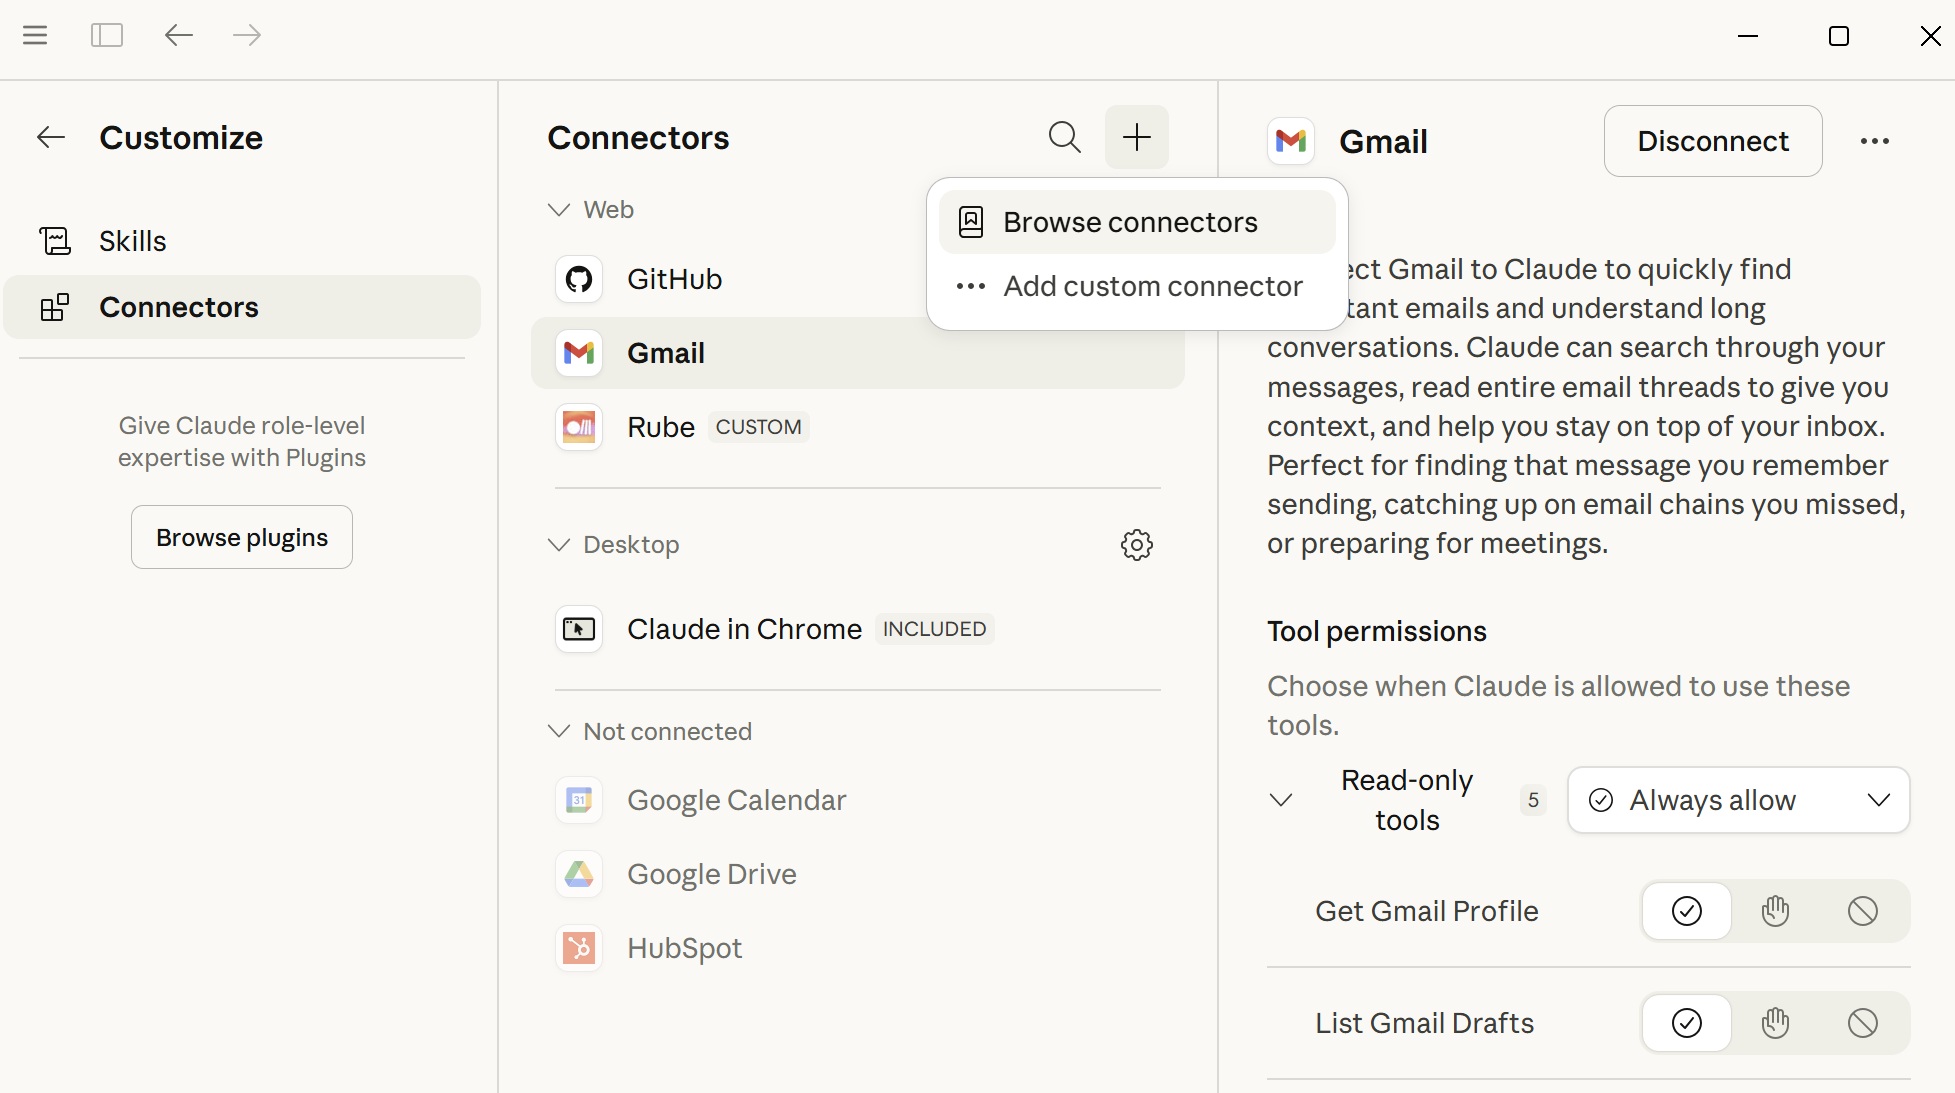
There are native and also third-party connectors in Claude. You can configure which ones are turned on by opening the Desktop app (or claude.ai on web). Go to “Customize” in the left side bar > Connectors and then turn on and sign in to any that you’d like to connect Claude to. Note, the native email connectors are read-only, although Gmail now also writes drafts.
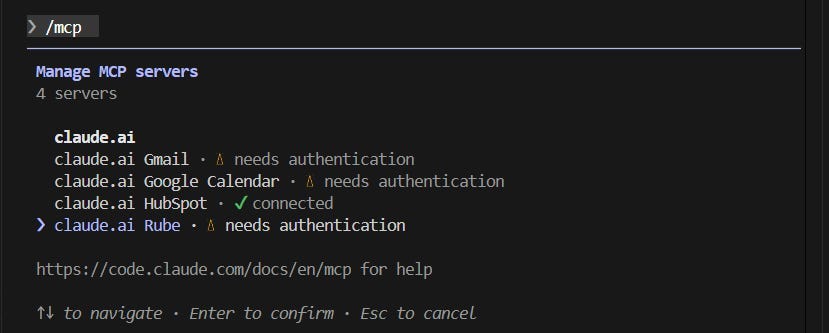
These connectors should carry over to Claude Code. In Claude Code, you can type /mcp and see all the connectors that are enabled.
You may need to reauthenticate your connector in Claude Code. Type /mcp in Claude Code to list the connectors you have available. Use your arrow keys to select the relevant connector and hit Enter to reauthenticate.
Try it out! Ask Claude to pull today’s emails and let you know what you should respond to.
Rube - a bucket of connectors
If a connector exists in Claude that meets your needs, we’d recommend using that. However, if a connector doesn’t exist or doesn’t include the permissions you’d want, then it may be available through Rube.
Rube is a service that makes connecting Claude to apps easy, including apps that don’t have native connectors in the Claude app. It’s a free product from Composio, a well-known AI developer tools company. They also have an inexpensive enterprise version of the product.
Think of Rube as a bucket of connectors. Once you connect Claude to Rube, you then select the specific apps you want Claude to access (e.g. Gmail, Outlook, Calendar, Drive, Hubspot, Quickbooks, X, etc). You individually authenticate into each one with whichever account is most appropriate through the Rube web interface, and then Claude will have access to those tools.
To set up Rube:
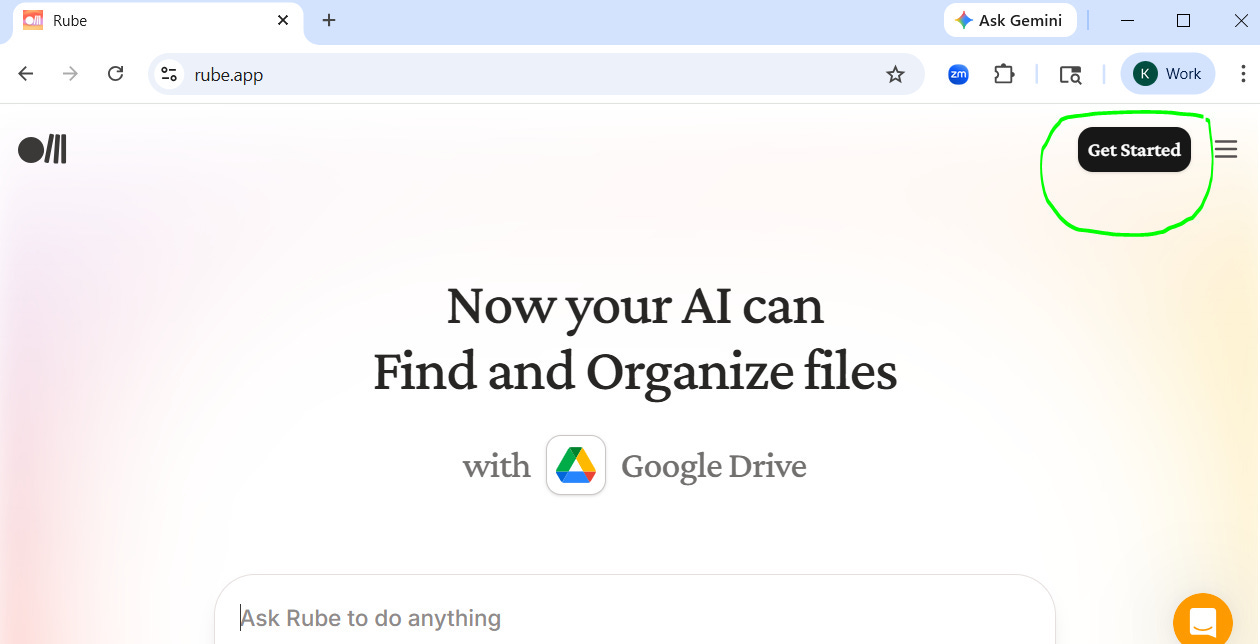
Go to rube.app. Click “Get Started” at the top right and create an account. Note, you will not need to download anything from Rube - all of the steps will be completed in the browser. Note, if you have any challenges signing in with the Google authentication, just enter your email address directly.
Navigate to Apps > Marketplace. Then choose one or more apps to connect to. Click “Connect” and authenticate.
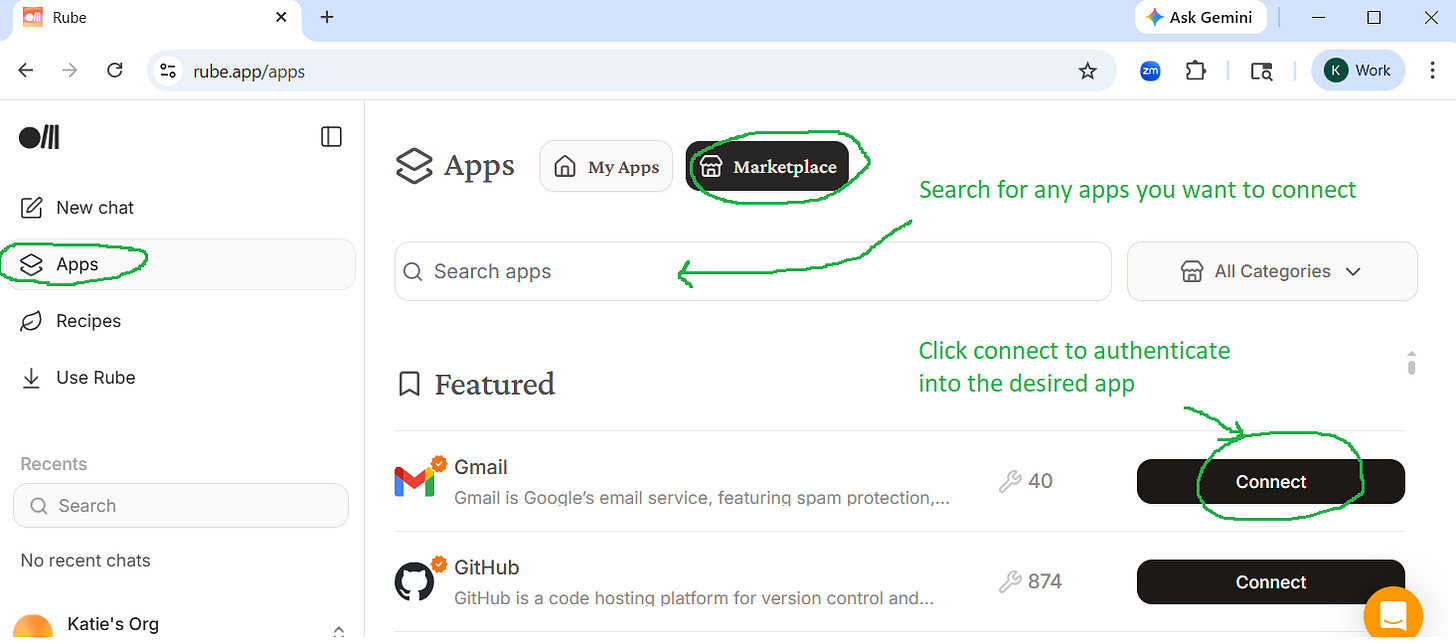
Click “Apps” (on left). Click “Marketplace” (top middle). Search for apps you want to connect. Click “Connect” on the relevant app and then authenticate. Connect Claude to Rube
There are two ways to connect Claude to Rube (through the Desktop app or directly in the terminal):
Option A - through the Desktop app
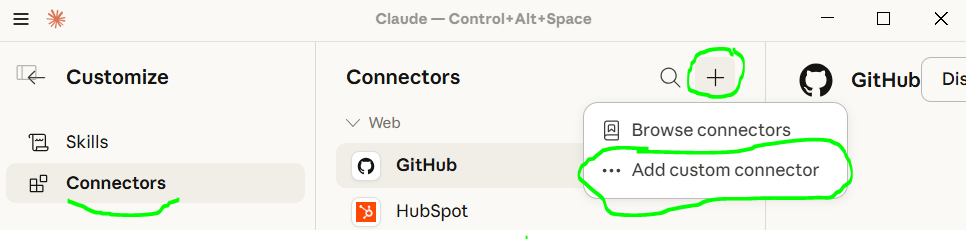
In the Claude Desktop app, click “Customize” (left sidebar) > Connectors > “+” > Add custom connector.

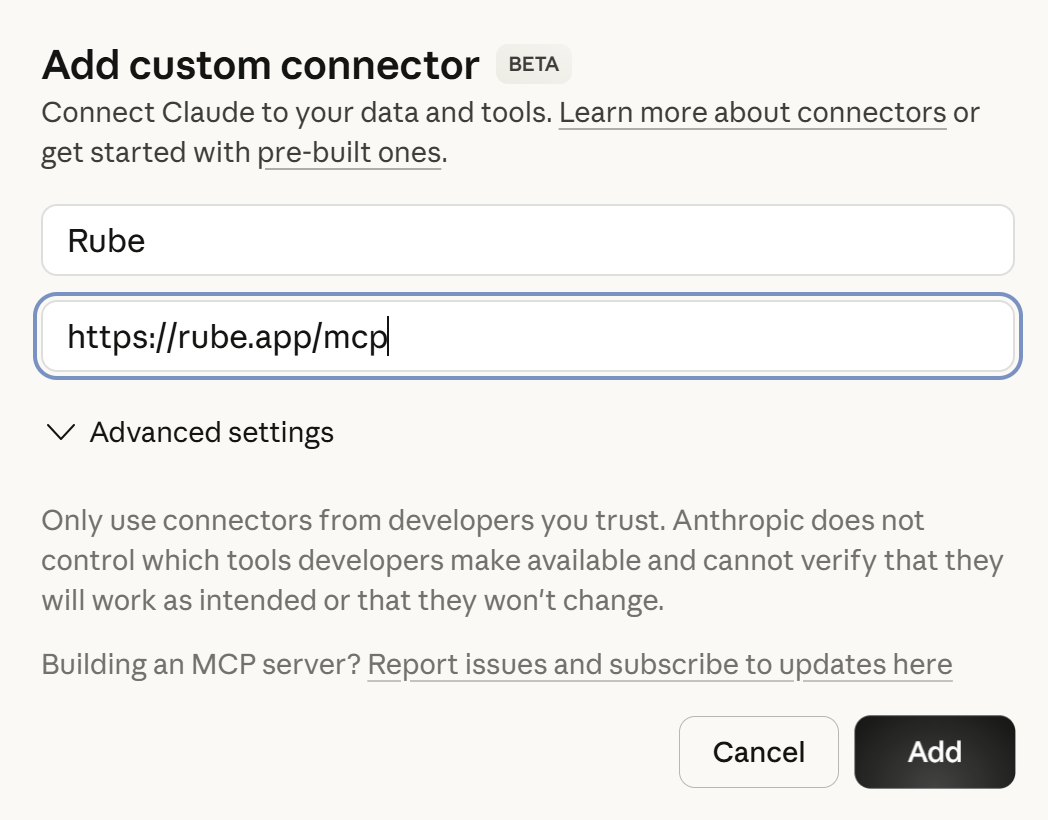
Customize (left sidebar) > Connectors > “+” > Add custom connector Fill in the connector details:
Rube in “Name” and the text below in “Remote MCP”.
https://rube.app/mcp
Return to Claude Code (in VSCode) and authenticate the mcp.
Type
/mcp. This will list your connectors.
/mcpwill list your MCP connectors. Use your arrow keys to navigate to Rube and hit enter to authenticateUse the arrow keys to navigate to claude.ai Rube mcp. Hit enter to authenticate. This will open a browser where you can sign in. Then return to Claude code in VSCode.
You may need to exit and restart Claude for it to work. Type
/exit(enter) to exit. Thenclaude(enter) to restart Claude.
Option B - Connect Directly in the Terminal
If Option A did not work, try connecting Claude Code to the Rube MCP directly:
Run
claudein VSCode. Then paste:mcp add rube --transport http https://rube.app/mcp(enter). It will ask you if you want to proceed. Hit Enter to proceed.Type
/exit(enter) to exit claude. Then typeclaude(enter) to restart Claude.Type:
/mcpto see your servers (enter). You should now see rube. Select rube and hit enter to authenticate in your browser. Log in.
You now have Rube installed.
Try it out! Ask Claude to “use rube to do xyz” where xyz could be “read my recent emails” or “summarize my calendar for this week” or “pull recent client notes on x client from Hubspot”. You should be able to see it use Rube to go connect to the app and execute the task.
Part 5: Teach Claude To Work Better With You
There are two things that make a big difference in how well Claude works with you over time:
CLAUDE.md file - a file in your working folder which Claude will automatically read at the start of every conversation. Anything you always want Claude to know goes here.
Skills - more detailed instructions for how to accomplish certain tasks (draft an email in your voice, Slack your team, pull data from your CRM)
Read our post Let Claude Keep Track of Everything for more context on this idea.
Create your CLAUDE.md
Prompt Claude Code:
“Please create a CLAUDE.md file for this folder. This is where you’ll keep track of how to work with me - my preferences, any rules, and how things are organized. Before you create it, ask me some questions so you can make it useful from the start.”
Don’t worry about making it perfect - you can ask it to make updates at any time.
What kinds of things should end up in CLAUDE.md over time?
A map of your folder structure so Claude always knows where things are
How you like to communicate (be concise, don’t hedge, ask before guessing)
Rules and guardrails (drafts only for email, read-only for financial data)
Which tools and accounts are connected and any quirks about how they work
Anything you got tired of repeating
Have Claude Build Skills
Not everything about working with you belongs in CLAUDE.md. More detailed instructions (like exactly how to draft an email in your voice) belong in a Skill. Think of CLAUDE.md as Claude’s cheat sheet that it reads every time. Skills are more like playbooks it pulls out only when needed. This keeps Claude focused instead of overwhelmed.
You’ll prompt Claude to create a Skill in the correct folder. After you’ve created one Skill, it usually will know to put any others in the same place.
Prompt Claude to create your first skill (fill in “xyz” in the prompt below):
When we create a skill, it must go in .claude/skills/[name]/SKILL.md. Include when to trigger the skill, step-by-step instructions, and any specific details you’ve learned through our work. I want to create a skill for [xyz topic]. Please ask me questions that will help you determine how the skill should work.
Claude will create the Skill and then call upon it as necessary. You can also explicitly invoke the Skill by asking Claude to use it or by typing “/” and then the Skill name. Note: you will need to close (/exit) and restart Claude for that slash command shortcut to show up.
Any time you work for a while with Claude, we’d recommend asking Claude to reflect and consider whether it should add/update any skills.
Prompt Claude:
Look back at what we did this session. Were there any steps that were repetitive, awkward, or that I had to explain from scratch? If we do something similar again, what would make it faster - a new skill, an update to an existing one, or something added to CLAUDE.md? Give me a short list of suggestions, and for each one, tell me what the skill would do and what I’d type to invoke it. If nothing stands out, just say so.
Often this process will help Claude get better at using its own tools (e.g. email, Slack, CRM data pulls) over time, even if you the human aren’t sure what could be done better in the future. Simply ask Claude and it will figure out what to document.
Our Favorite Skills
We both have built up a long list of Skills with Claude covering everything from meeting prep to email drafting to pulling data from other systems. But our favorite Skills relate to helping Claude get better at working with us:
Memorialize - Katie had Claude write a Skill to look at the conversation and determine if any updates should be made to Claude.md or new/existing Skills. She invokes “/memorialize” often. (Note, Claude Code has a few more memory concepts under the hood but you don’t need to worry about them - Claude sorts it out).
Diary & Reflect - Claire had Claude build a “/diary” Skill which documents whatever they’ve been working on together into a memory file with a timestamp and brief summary at the top of the file. She also built a “/reflect” Skill to review past diary entries, spot patterns, and propose updates to CLAUDE.md.
These Skills create a positive feedback loop. Your agent gets better by learning from real collaboration with you.
Part 6: Risk Management
The more you connect AI to your systems and workflows, the more useful it is. However, there are also real risks: AI can make mistakes or do things differently than you would have. There is also prompt injection risk (a bad actor tricks your AI through hidden instructions in content it reads). And AI could potentially download something you don’t want on your device.
How should you manage this risk?
Monitor what Claude is doing closely. It will explicitly ask for permissions from you. And if you see it doing something you don’t like, hit “stop” or escape.
Make more conservative choices to start (e.g. “put this in drafts” rather than directly sending an email without your review).
Consider modeling after a real executive assistant in order to sandbox access. Katie initially created a new email for her AI assistant with access to a limited set of folders, its own inbox, and delegate calendar access. Much like you’d set up with a human EA.
Consider having it add “sent with Claude” to the bottom of messages.
If Claude is suggesting something you’re not sure about (e.g. downloading a software package), ask it to research safety of that package or go speak to your IT team about how to validate that it’s safe software.
Ask Claude Code to create Hooks to help mitigate risks of prompt injection or other problematic actions. Hooks automatically run when a trigger is hit, so they can be good for safety checks. Hooks could include:
Preventing deletion of any files
Preventing sending of any emails
Preventing Claude from taking actions on instructions that come through a tool call (e.g. reading an email)
Preventing downloading of attachments without your explicit approval.
None of these approaches will remove 100% of the risk. Please be careful as you use Claude.
Claude Code Courses
There’s a lot to learn, and it’s changing fast. Katie’s team at Recalc Academy recently launched a Claude Code for Business Users course to make it easier to learn how to work with Claude Code.
Learn more here: https://recalcacademy.com/courses/claude-code-bootcamp/
Technically Curious Substack Disclaimer
We’re figuring this out and sharing what we learn as we go. This is intended to be practical advice based on our own experimentation - not professional guidance. We make no representations about accuracy or outcomes and aren’t responsible for how you use this information. Features and interfaces may change. We disclaim all liability, and you are responsible for your own use of AI.
Thank you to our talented co-writer Claude.
Solid guide for getting started. One thing I'd emphasize more: the CLAUDE.md file is where the real magic happens, and most people write it wrong at first.
Common mistake I made early on: treating CLAUDE.md like documentation. Long paragraphs explaining what the project does, detailed API descriptions, verbose instructions. The agent doesn't need that - it can read the codebase.
What it actually needs: behavioral rules, decision boundaries, and autonomy levels. "Execute first, refine later" as a rule did more than 100 lines of task instructions.
I wrote up the structure that works after 1000+ sessions of iteration: https://thoughts.jock.pl/p/how-i-structure-claude-md-after-1000-sessions
The memorialize and diary/reflect skill patterns are really clever. I do something similar and it's one of those habits that compounds fast -- after a few weeks the CLAUDE.md and skills get genuinely tailored. One small tip for anyone following this guide: run /init when you first set up a project folder and Claude will scaffold a decent CLAUDE.md for you automatically, which saves a bit of the initial back-and-forth.